 How to Turn an 8-Bar Loop Into a Full Song (Step-by-Step Guide)
Introduction
Every producer has experienced it.
You spend an hour crafting the perfect 8-bar loop. The drums knock, the melody is catchy, the bass hits hard, and everything sounds incredible. You play it over and over because it feels like a hit.
Then reality sets in.
You have no idea where to go next.
Learning how to turn a loop into a complete song is one of the biggest milestones in music production. While creating great loops is an important skill, finishing songs is what separates hobbyists from professional producers.
In this guide, you’ll learn a simple, repeatable workflow for transforming any solid 8-bar loop into a polished arrangement that keeps listeners engaged from beginning to end.
Step 1: Build a Strong Foundation
Before arranging anything, make sure your loop is worth expanding.
Your loop should include the essential ingredients of the song:
- Chord progression
- Main melody
- Drum groove
- Bass or 808
- One or two supporting instruments
Avoid adding every possible sound at this stage. It’s much easier to build excitement by introducing new elements later than trying to remove clutter from an overly busy loop.
Ask yourself:
- Is the groove strong enough to repeat?
- Is the melody memorable?
- Does the bass support the chords?
- Would someone nod their head after hearing it once?
If the answer is yes, you’re ready to arrange.
Step 2: Create an Intro
The intro introduces the listener to the world of your song.
Instead of starting with every instrument playing at once, strip your loop down to its essentials.
Some effective intro ideas include:
- Chords only
- Piano and pad
- Melody with filtered drums
- Ambient textures
- Vocal chops
- Reverse effects
- Vinyl crackle or atmosphere
Keep the intro simple and use it to build anticipation.
Typical length: 4–8 bars.
Step 3: Build the First Verse
The verse is where the song begins to develop.
Rather than throwing everything at the listener immediately, leave room for a vocalist or lead instrument.
A good verse might include:
- Kick
- Snare
- Hi-hats
- Bass
- Chords
- Primary melody
Hold back your biggest sounds for later.
Professional arrangements often feel powerful because they save the best moments for the chorus.
Step 4: Create a Pre-Chorus (Optional)
A pre-chorus helps build tension before the biggest section of the song.
Try creating anticipation by:
- Removing the kick
- Filtering instruments
- Raising the pitch of effects
- Adding risers
- Increasing drum intensity
- Automating reverb or delay
Even a short four-bar pre-chorus can make your chorus feel significantly larger.
Step 5: Make the Chorus Feel Bigger
Your chorus should be the emotional high point of the track.
If it sounds identical to the verse, listeners won’t feel the impact.
Here are a few ways to make your chorus stand out:
- Add new melodies
- Layer additional synths
- Double percussion
- Widen stereo elements
- Increase bass energy
- Introduce counter melodies
- Open filter automation
The goal isn’t to make the chorus louder—it’s to make it feel bigger.
Step 6: Use Transitions Between Sections
Smooth transitions make your beat feel professional.
Without them, sections can feel disconnected or abrupt.
Some of the most effective transition tools include:
- Drum fills
- Reverse cymbals
- White noise risers
- Impacts
- Tape stops
- Filter sweeps
- Vocal effects
- Delay throws
Think of transitions as bridges that guide the listener from one section to the next.
Step 7: Add Variation Throughout the Song
Repeating the same eight bars over and over is one of the fastest ways to lose your audience.
Instead, introduce subtle changes every few bars.
Easy variations include:
- Different hi-hat rhythms
- Extra percussion
- Drum mutes
- Melody changes
- Bass fills
- Automation
- New sound layers
- Call-and-response phrases
Small changes create movement without changing the identity of your beat.
Step 8: Create a Bridge
The bridge gives listeners a break from familiar patterns.
This section is your opportunity to surprise them.
Ideas include:
- Switching instruments
- Removing the drums
- Introducing a new chord voicing
- Half-time drums
- Atmospheric textures
- Solo piano
- Vocal sample breakdown
A bridge refreshes the listener’s ears before the final chorus.
Step 9: Finish With an Outro
Don’t let your song end abruptly.
An effective outro helps the track feel complete.
Some ideas include:
- Remove drums gradually
- Let the chords fade naturally
- Repeat the melody with fewer instruments
- Add delay tails
- End with a filtered version of the intro
Think of the outro as the closing scene of a movie—it should leave a lasting impression.
Step 10: Review the Entire Arrangement
Before exporting your beat, listen from beginning to end without touching the mouse.
Ask yourself:
- Does every section serve a purpose?
- Is the chorus noticeably bigger than the verse?
- Are transitions smooth?
- Does the song continue evolving?
- Are there repetitive sections that need variation?
- Does the ending feel intentional?
Professional producers rarely finish a beat after the first arrangement. They listen critically, make improvements, and polish the experience.
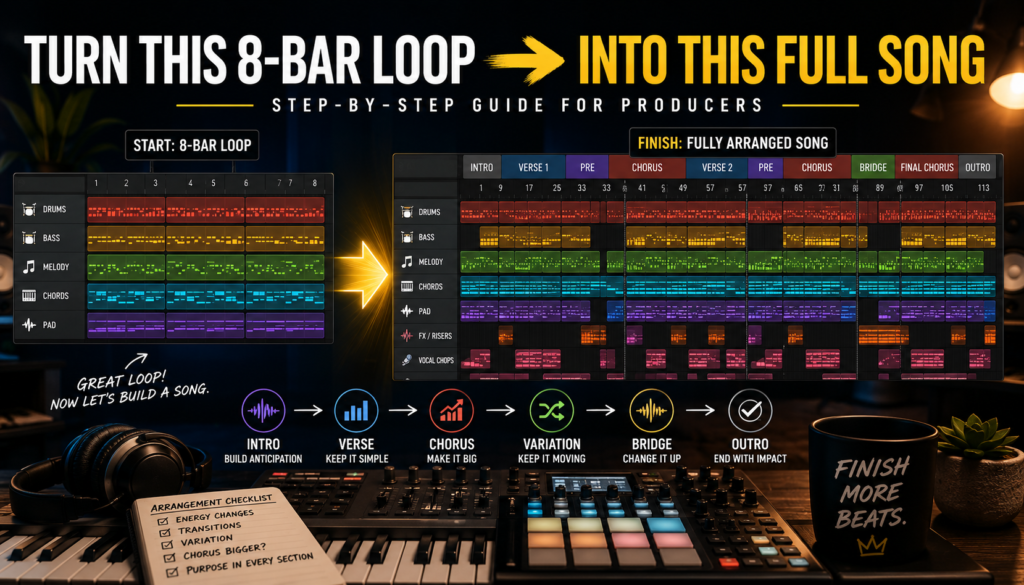
A Simple Beat Arrangement Template
If you’re unsure where to begin, try this structure:
- Intro – 8 bars
- Verse – 16 bars
- Pre-Chorus – 8 bars
- Chorus – 16 bars
- Verse 2 – 16 bars
- Chorus – 16 bars
- Bridge – 8 bars
- Final Chorus – 16 bars
- Outro – 8 bars
Remember, this is only a guide. Different genres and artists may require different structures, but having a template helps you finish more songs consistently.
Final Thoughts
The biggest obstacle for many producers isn’t creativity—it’s knowing how to develop great ideas into complete songs.
Instead of chasing a new loop every time inspiration strikes, commit to finishing what you’ve already started. Every completed beat teaches you something about arrangement, dynamics, pacing, and storytelling.
The next time you create an amazing 8-bar loop, don’t stop there.
Build an intro. Shape a verse. Create a powerful chorus. Add transitions, variation, and emotion.
Because finished songs—not unfinished loops—are what build your catalog, grow your audience, and move your music career forward.