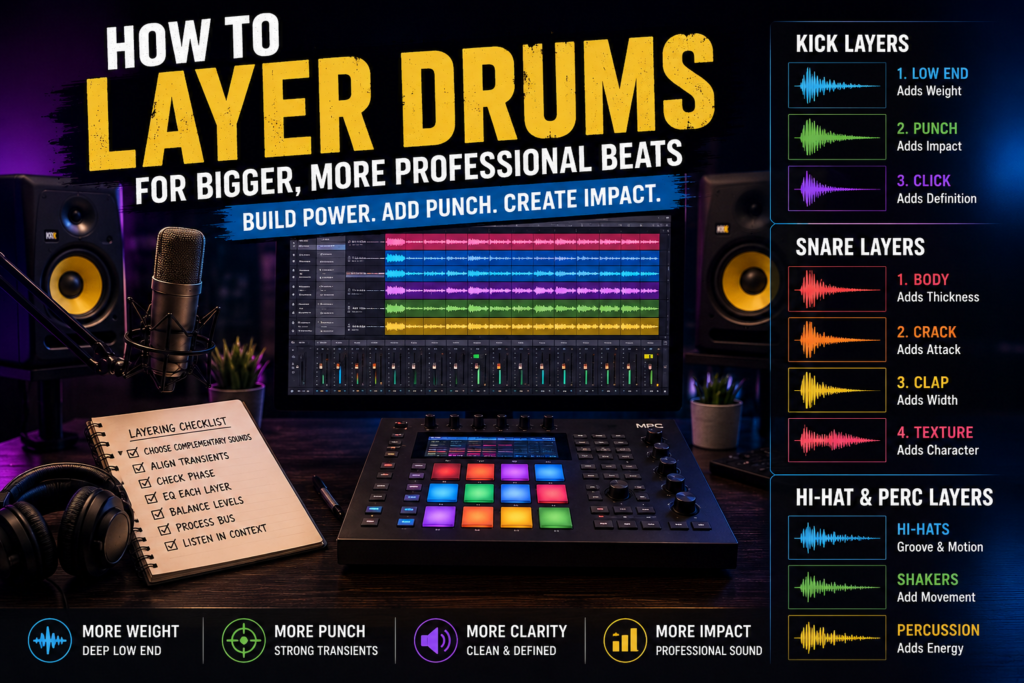
 One of the biggest differences between beginner and professional productions isn’t expensive plugins or high-end studio gear—it’s drum layering.
If you’ve ever wondered why your kicks don’t hit hard enough, your snares sound thin, or your drums feel lifeless compared to commercial tracks, the problem often isn’t your samples. It’s how you’re combining them.
Professional producers rarely rely on a single drum sample. Instead, they carefully layer complementary sounds to create drums that feel powerful, balanced, and full of character.
In this guide, you’ll learn the fundamentals of drum layering, common mistakes to avoid, and practical techniques you can start using immediately to make your beats sound bigger and more polished.
Why Drum Layering Matters
Every drum sample has strengths and weaknesses.
One kick might have incredible low-end but lack attack. Another might cut through the mix beautifully but have very little sub bass. Rather than choosing one over the other, producers often combine multiple samples to create the perfect sound.
The same idea applies to snares, claps, hi-hats, percussion, and even cymbals.
Effective layering allows you to:
- Add punch without increasing volume
- Create fuller drum sounds
- Improve clarity in a mix
- Build unique drum kits
- Give your beats a more professional sound
The goal isn’t to use more sounds—it’s to use the right sounds together.
How to Layer Kick Drums
The kick drum is the foundation of many hip-hop, trap, R&B, and electronic beats.
A well-layered kick often consists of two or three complementary sounds.
Layer 1: The Low End
This layer provides the weight and sub frequencies that listeners feel.
Look for samples with:
- Deep bass
- Smooth sustain
- Strong low-frequency presence
Avoid adding too much click or high-end in this layer.
Layer 2: The Punch
The second layer provides impact.
Choose a kick with:
- Strong transient
- Midrange attack
- Quick decay
This helps the kick cut through speakers without relying solely on volume.
Layer 3: The Click
Some producers add a subtle click layer to improve definition.
This is especially useful when beats are played through phone speakers, laptops, or smaller Bluetooth speakers that can’t reproduce deep bass effectively.
Keep this layer subtle—it should enhance the kick, not overpower it.
How to Layer Snares
Great snares often combine multiple textures.
Instead of relying on one sample, think of each layer as serving a different purpose.
Body
Provides the weight of the snare.
Crack
Adds brightness and attack.
Clap
Creates width and excitement.
Texture
Light percussion, noise, or foley can add personality without overwhelming the mix.
Not every snare needs four layers. Sometimes two carefully selected sounds produce the strongest result.
Layering Hi-Hats and Percussion
Hi-hats are often overlooked, but thoughtful layering can dramatically improve groove and movement.
Try combining:
- Closed hats
- Open hats
- Shakers
- Tambourines
- Rim shots
- Percussion loops
Use different velocities and timing to create a more human feel.
Instead of programming every hi-hat at the same volume, introduce subtle variations to add life and bounce.
Avoid Frequency Overlap
One of the biggest mistakes beginners make is stacking multiple samples that occupy the same frequency range.
When this happens, your drums can become muddy instead of powerful.
For example:
- Remove unnecessary low frequencies from claps.
- Reduce harsh high frequencies on kick layers.
- Carve out competing frequencies between snare layers.
Think of each drum layer as having its own job within the mix.
Check for Phase Issues
Phase problems can make layered drums sound weaker instead of stronger.
If two kick samples are slightly out of alignment, they may partially cancel each other out.
Whenever you add a new layer:
- Zoom into the waveform.
- Align the transient.
- Flip the polarity if necessary.
- Listen carefully to determine which version sounds fuller.
Your ears are always the best judge.
Use Compression Sparingly
Compression can help glue layered drums together, but too much compression can remove punch and dynamics.
A gentle drum bus compressor can:
- Improve consistency
- Add cohesion
- Control peaks
Avoid compressing individual layers aggressively unless there’s a specific reason to do so.
Sometimes excellent sample selection eliminates the need for heavy processing altogether.
Add Character with Saturation
Saturation introduces subtle harmonic content that can make drums sound warmer and more energetic.
Many producers use light saturation on:
- Kick buses
- Snare buses
- Drum buses
A small amount often adds more excitement than excessive EQ or compression.
The key is subtlety.
Common Drum Layering Mistakes
Using Too Many Samples
More isn’t always better.
Three well-matched samples usually outperform eight random ones.
Ignoring Gain Staging
Layering increases volume quickly.
Lower each individual sample before combining them to preserve headroom.
Choosing Similar Samples
If every layer sounds nearly identical, you won’t gain much benefit.
Look for complementary sounds rather than duplicates.
Forgetting the Mix
Drums should sound impressive within the full beat—not only when soloed.
Always make layering decisions while listening to the entire production.
Practice Exercise
A great way to improve your layering skills is to limit yourself.
Create one drum kit using:
- Three kick layers
- Two snare layers
- One clap
- Two hi-hat samples
- One percussion element
Once finished, compare it with your previous drum kits.
Ask yourself:
- Does the kick feel more powerful?
- Does the snare cut through better?
- Are the drums clearer?
- Does each layer have a purpose?
Repeating this exercise with different sample combinations will quickly sharpen your ear.
Final Thoughts
Drum layering isn’t about making your beats louder—it’s about making them smarter.
Every layer should contribute something unique, whether it’s low-end weight, punch, texture, or clarity. By choosing complementary samples, managing frequencies, checking phase relationships, and avoiding unnecessary complexity, you’ll create drums that sound bigger, cleaner, and more professional.
Like any production skill, mastering drum layering takes practice. Spend time experimenting with different combinations, study the drums in your favorite songs, and trust your ears over presets or trends.
The next time your drums feel underwhelming, don’t rush to download another sample pack. Start by making better use of the sounds you already have. Often, the difference between an average beat and a professional one is simply knowing how to layer your drums with intention.